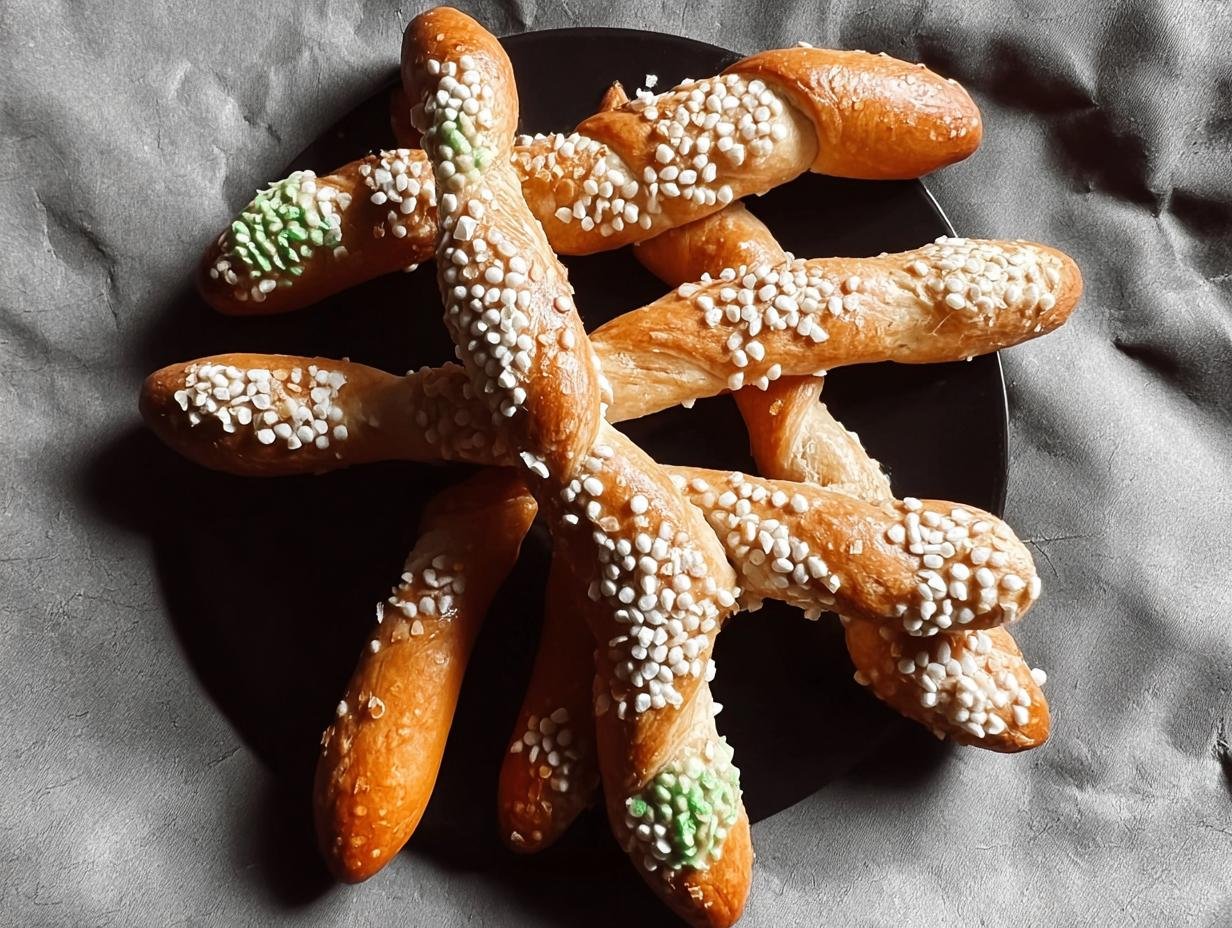
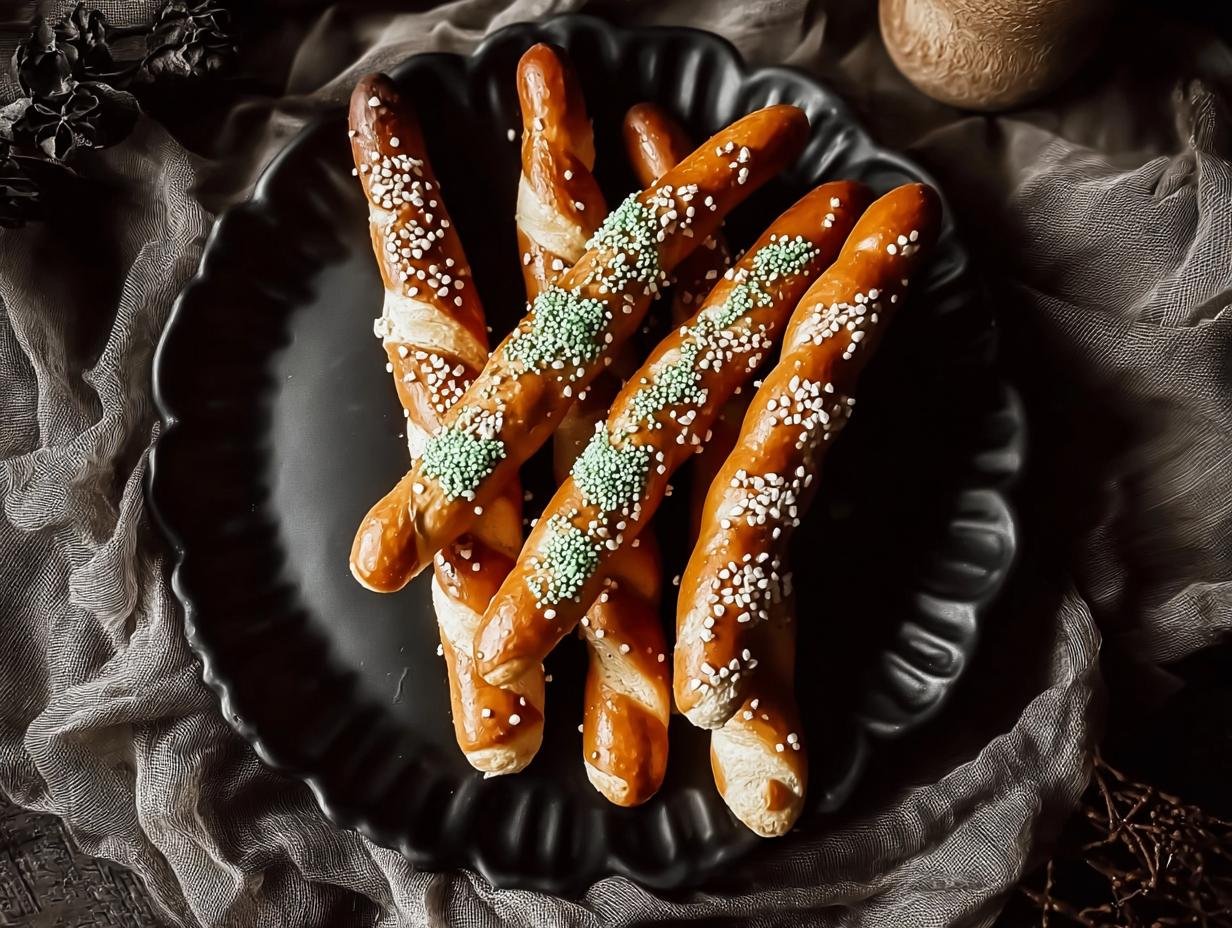
Witch Finger Pretzels have become my absolute favorite spooky treat to whip up every October. I vividly remember my mom making these creepy creations when I was a kid; the sight of those gnarled pretzel fingers with almond nails always sent a shiver of delight down my spine. Now, I get to pass on that joy, and let me tell you, these Halloween witch finger pretzels are a guaranteed hit. They’re not just a snack; they’re fun, edible Halloween crafts that kids and adults alike can’t resist. The satisfying crunch of the pretzel followed by the sweet, smooth candy coating is pure magic. Let’s get cooking!
Why You’ll Love This Witch Finger Pretzel Recipe
- Taste: A delightful mix of salty crunch and sweet candy coating that’s utterly addictive.
- Prep Time: Super fast! You can whip up a batch in under 20 minutes, making it an easy witch finger pretzel recipe for busy hosts.
- Budget-Friendly: Uses simple, inexpensive ingredients that won’t break the bank.
- Family-Friendly: Kids adore helping to decorate these spooky treats, making it a fun activity for everyone.
- No-Bake Wonder: Perfect for when you don’t want to turn on the oven, especially during warmer Halloween parties.
- Versatile: This easy witch finger pretzel recipe is a fantastic base for countless spooky designs.
- Spooky Fun: They’re guaranteed to be a conversation starter and a hit at any Halloween gathering.
Witch Finger Pretzel Ingredients
Gathering the right witch finger pretzel ingredients is the first spooky step to creating these creepy delights. You’ll need the foundation for our spooky snacks: 12 large pretzel rods (7-8 inches long). These provide the perfect crunchy base. For that eerie green glow, grab 12 ounces of green candy melts. They melt beautifully and give our pretzels their signature witchy color. To create the creepy fingernails, we’ll use 8 ounces of black candy melts for dipping our almonds. And finally, the essential detail: 12 slivered almonds, which will become our ghastly fingernails. These simple ingredients come together to make the best witch finger pretzels.

How to Make Spooky Witch Finger Pretzels
Let’s get down to business and learn how to make witch finger pretzels that will have your guests cackling with delight! These creepy confections are surprisingly simple, and the results are wickedly fun.
- Step 1: First, we prepare the ghastly fingernails. Melt the black candy melts according to the package directions. I usually use a microwave in 30-second intervals, stirring in between until smooth. Dip each slivered almond into the melted black candy, ensuring it’s fully coated. Place the coated almonds on a piece of parchment paper. Let them set completely, which takes about 15-20 minutes in a cool spot or a few minutes in the fridge.
- Step 2: While those fingernails are hardening, melt your green candy melts. Again, microwave in short bursts, stirring until you have a smooth, vibrant green coating. This is the base color for our spooky fingers.
- Step 3: Now it’s time to coat the pretzel rods. Dip each pretzel rod about halfway into the melted green candy. Gently shake off any excess candy melt; you want a nice, even coating, not a thick, drippy mess. Lay the coated pretzel rods flat on a fresh sheet of parchment paper.
- Step 4: While the green coating is still wet, it’s time to add the creepy fingernails! Gently press one of your prepared black almond fingernails onto the tip of each pretzel rod. Make sure it’s firmly in place so it doesn’t fall off later. This is where the transformation into spooky fingers really begins!
- Step 5: For that extra touch of realism, grab a toothpick. While the green coating is still slightly soft, carefully draw knuckle lines on the pretzel. This adds texture and makes your witch finger pretzels look wonderfully gnarled and ancient. It’s these little details that make how to make witch finger pretzels so rewarding!
- Step 6: Finally, let your creations set completely. Leave them undisturbed on the parchment paper for at least 30 minutes. You can speed this up in the refrigerator for about 10-15 minutes. Once hardened, your spooky witch finger pretzels are ready to impress!
Pro Tips for the Best Witch Finger Pretzels
These little tips will make your spooky snacks even more spectacular:
- Always use good quality candy melts; they melt smoother and set firmer than regular chocolate chips.
- If your candy melts start to thicken, stir in a teaspoon of vegetable oil or shortening to thin them out.
- Work in batches for both melting and dipping to ensure the candy stays at the perfect consistency.
- Don’t be afraid to get creative with the knuckle lines – some thicker, some thinner adds to the gnarled look!
What’s the secret to perfect spooky witch finger pretzels?
The real magic is in the details! Using slivered almonds for nails and drawing realistic knuckle lines with a toothpick elevates these from simple treats to truly creepy creations. This attention to detail is key for amazing witch finger pretzel decorating ideas.
Can I make witch finger pretzels ahead of time?
Absolutely! These treats are perfect for making ahead. Once fully set, store them in an airtight container at room temperature. They’ll stay fresh and spooky for several days, making your Halloween party prep a breeze.
How do I avoid common mistakes with witch finger pretzels?
A common pitfall is overheating the candy melts, which can make them seize or become grainy. Melt them slowly and stir constantly. Also, make sure your pretzel rods are completely dry before dipping to ensure the candy coating adheres properly.
Best Ways to Serve Halloween Witch Finger Pretzels
These creepy confections are fantastic on their own, but they truly shine when presented as part of a larger spooky spread. Arrange your Halloween witch finger pretzels on a platter alongside other creepy food ideas, like gummy worms or ghost-shaped cookies, for a truly haunted dessert table. They also make a perfect addition to a Halloween candy buffet, offering a salty-sweet crunch that contrasts wonderfully with sugary treats. For a party centerpiece, group them in a “cauldron” or a themed vase. They’re also ideal as kid friendly Halloween snacks, especially when served with a side of fruit dip or yogurt for a slightly healthier option.
Nutrition Facts for Witch Finger Pretzels
When you’re diving into these spooky snacks, it’s helpful to know what you’re getting. Here’s a breakdown of the estimated nutrition per pretzel:
- Calories: 150 kcal
- Fat: 7 g
- Saturated Fat: 3 g
- Protein: 2 g
- Carbohydrates: 20 g
- Fiber: 1 g
- Sugar: 10 g
- Sodium: 150 mg
Nutritional values are estimates and may vary based on specific ingredients used.
How to Store and Reheat Halloween Pretzel Ideas
Properly storing your spooky witch finger pretzels ensures they stay delightfully crisp and creepy for your Halloween festivities. Once your pretzels have completely cooled on the parchment paper, the trick is to find the right container. For short-term storage, airtight plastic containers or resealable bags work perfectly. You can keep these enchanting treats in the refrigerator for about 3-4 days. If you’re planning way ahead, these Halloween pretzel ideas freeze beautifully! Wrap them individually in plastic wrap, then in aluminum foil, and store them in the freezer for up to 3 months. When you’re ready to serve them from frozen, let them thaw gradually in the refrigerator overnight. For a quick refresh if they seem a bit soft, you can briefly place them on a baking sheet in a 300°F (150°C) oven for just 1-2 minutes to help crisp them up again.
Frequently Asked Questions About Witch Finger Pretzels
Can I use regular chocolate instead of candy melts?
You can, but candy melts are specifically designed to melt smoothly and harden quickly, which is ideal for coating pretzels. If you use regular chocolate, you might need to add a bit of vegetable shortening to achieve a similar consistency. Also, ensure your pretzels are completely dry, as regular chocolate can seize if it comes into contact with any moisture. This is a key tip for any good witch finger pretzel tutorial.
What other shapes can I use for the fingernails?
Slivered almonds are classic, but feel free to get creative! You could use a small piece of dried fruit, a mini chocolate chip pressed into the candy melt, or even a tiny piece of red candy for a bloody effect. The goal is to mimic a nail, so think about small, elongated shapes. Experimenting with these different elements can really make your witch finger pretzels unique!
How do I get the candy melt coating smooth?
The trick to smooth candy melts is to melt them slowly and stir frequently. Avoid overheating, as this can cause them to become thick and lumpy. If they do get too thick, you can add a teaspoon of vegetable oil or shortening to thin them out. A smooth coating is essential for that creepy, gnarled look that makes these Halloween witch finger pretzels so effective.
Can I make these gluten-free or vegan?
Yes! For gluten-free witch finger pretzels, simply use gluten-free pretzel rods. For vegan options, ensure your candy melts are dairy-free (many green and black candy melts are naturally vegan, but always check the ingredients) and use vegan slivered almonds. This makes them accessible for more guests and expands your Halloween pretzel ideas.
Variations of Witch Finger Pretzels You Can Try
Looking to spice up your spooky spread? These witch finger pretzels are super versatile and can be adapted in so many fun ways to fit your party theme and dietary needs. They are some of the best creepy food ideas around!
- Savory Witch Fingers: Skip the candy melts and use melted cheese or a savory herb dip instead. For the “nails,” try a small piece of a pretzel stick or a dark sesame seed. These are a unique twist on traditional sweet witch finger pretzels.
- Keto Witch Fingers: For a low-carb option, use sugar-free white chocolate or green-tinted coconut oil as your coating. Pair with keto-friendly pretzel alternatives or even blanched almonds as the base, using sugar-free slivered almonds for the nails.
- Gluten-Free Witch Fingers: Easily make these gluten-free by swapping out the regular pretzel rods for your favorite gluten-free pretzel sticks or rods. Many brands offer delicious GF options that work just as well!
- Rainbow Witch Fingers: Why stick to green? Use a variety of candy melt colors like purple, orange, or even a swirl of black and green for a truly magical effect. This adds a vibrant pop to your collection of Halloween pretzel ideas.

Witch Finger Pretzels: Easy Spooky Halloween Treat
- Total Time: 50 minutes
- Yield: 12 pretzels 1x
- Diet: Vegetarian
Description
Witch Finger Pretzels are spooky, no-bake treats perfect for Halloween celebrations, featuring a crunchy pretzel base and vibrant candy coating.
Ingredients
- 12 pieces Large Pretzel Rods (7–8 inches long)
- 12 ounces Green Candy Melts
- 8 ounces Black Candy Melts
- 12 pieces Slivered Almonds
Instructions
- Melt the black candy melts according to package instructions. Dip the slivered almonds into the melted chocolate and place them on parchment paper to set for about 15-20 minutes.
- In a separate bowl, melt the green candy melts until smooth. Stir well to ensure no lumps remain, creating a vibrant coating.
- Dip each pretzel rod halfway into the green candy melt, shaking off any excess to avoid a thick layer, and then lay them flat on parchment paper.
- While the green coating is still wet, gently press a coated almond onto the tip of each pretzel, ensuring it sticks well for that spooky effect.
- Using a toothpick, draw knuckle lines on the pretzel before the coating sets to give your Witch Finger Pretzels some character and realism.
- Allow the pretzels to set completely on parchment paper for at least 30 minutes. This ensures the candy coating hardens properly.
Notes
- Optional: Decorate with edible glitter or sprinkles for an extra festive touch!
- Feel free to mix colors and toppings to create various designs.
- Prep Time: 20 minutes
- Cook Time: 0 minutes
- Category: Snacks
- Method: No-Bake
- Cuisine: American
Nutrition
- Serving Size: 1 pretzel
- Calories: 150 kcal
- Sugar: 10 g
- Sodium: 150 mg
- Fat: 7 g
- Saturated Fat: 3 g
- Unsaturated Fat: 4 g
- Trans Fat: 0 g
- Carbohydrates: 20 g
- Fiber: 1 g
- Protein: 2 g
- Cholesterol: 0 mg


Leave a Reply